My Newborn Photography Editing Workflow
Published on
Introduction: Why Newborn Editing Matters
A well-structured newborn editing workflow is essential for producing polished, timeless images that parents will cherish forever. As a professional newborn photographer, your editing style becomes part of your brand—ensuring consistency across every gallery while enhancing the baby’s delicate features in a natural, flattering way. Gentle editing is especially important for babies to maintain their natural appearance, ensuring that newborn photos look soft and authentic. The final newborn photos are treasured keepsakes that parents will cherish for years to come.
Whether you’re just starting your newborn photography journey or refining your current process, mastering a consistent editing workflow is key to standing out in a competitive market. Editing newborn photos is a crucial skill for photographers, as it requires attention to detail and a gentle touch. A structured workflow can enable you to work more efficiently and achieve better results, giving you greater control over your sessions and optimizing your business processes. In this article, I’ll walk you through my own step-by-step newborn editing workflow, developed over years of experience photographing newborns in Glasgow.
Finding My Signature Newborn Editing Style
When I first launched my newborn photography business in Glasgow I quickly realized the importance of having a consistent editing style. Although I had a strong foundation in Photoshop and general retouching techniques, my early galleries lacked cohesion because I was constantly experimenting.
Over time, I found myself naturally drawn to a light and airy style—soft pastel tones and gentle retouching that enhance the baby’s natural beauty. Observing other photographers and their signature looks helped me refine my own approach and understand what sets my work apart. For example, I adopted a specific skin-smoothing technique and subtle colour grading to achieve my signature style. I tend to prioritise gentle adjustments and a non-destructive workflow when editing, which helps maintain a natural and timeless feel in my images. To achieve this look consistently, I created a structured newborn editing workflow that saves time and ensures professional-quality results across every session.
Resources like phlearn.com were invaluable in helping me develop the technical skills and artistic direction needed to define my style.
Preparing for a Newborn Photography Session
Every successful newborn photo editing workflow begins with proper preparation:
- Studio Setup: Ensure a warm, quiet, and calm environment to keep the baby comfortable, and plan for optimal lighting to achieve high-quality images.
- Camera Settings: I aim to get everything right in-camera—using soft natural looking light, correct exposure, and a custom white balance to minimise post-processing.
- Client Communication: I always brief parents beforehand so they know what to expect during the session. You can read my complete preparation guide for tips on getting ready for your newborn session.
I also plan different poses and gather creative ideas for the session to ensure variety and a smooth flow. Sometimes, I draw a mind map or diagram to organise my ideas and workflow for the session.
A smooth shooting process leads to better raw images and less editing time later.
Understanding Key Editing Concepts in Newborn Photography
Before diving into my editing process, it’s important to understand the core techniques that support and edit beautiful newborn images:
- White Balance & Exposure: Ensures skin tones look natural and true to life, achieving accurate colour for natural skin tones and preserving shadows to add depth and mood to the images.
- Frequency Separation: A non-destructive method to smooth baby skin while preserving texture.
- Layer Masking: Allows for precise, controlled edits, giving you control over your edits without affecting the entire image.
- Photoshop Actions: Automate repetitive tasks and help maintain consistency.
I avoid complicated techniques and prefer straightforward methods for most newborn editing tasks.
By keeping my editing workflow clean and focused, I’m able to enhance the baby’s features while preserving the purity and softness of the moment.
My Step-by-Step Newborn Editing Workflow
1. Image Selection in Adobe Bridge
The first step in my newborn editing workflow is selecting the best pictures and images from the session. I import all photos into Adobe Bridge, where I organize by session type and carefully choose the strongest images for the client’s gallery.
2. Base Adjustments in Adobe Camera Raw
Next, I open the selected images in Adobe Camera Raw to apply subtle corrections to:
- White balance
- Exposure
- Contrast
These foundational tweaks help me prepare the images for final retouching in Photoshop.
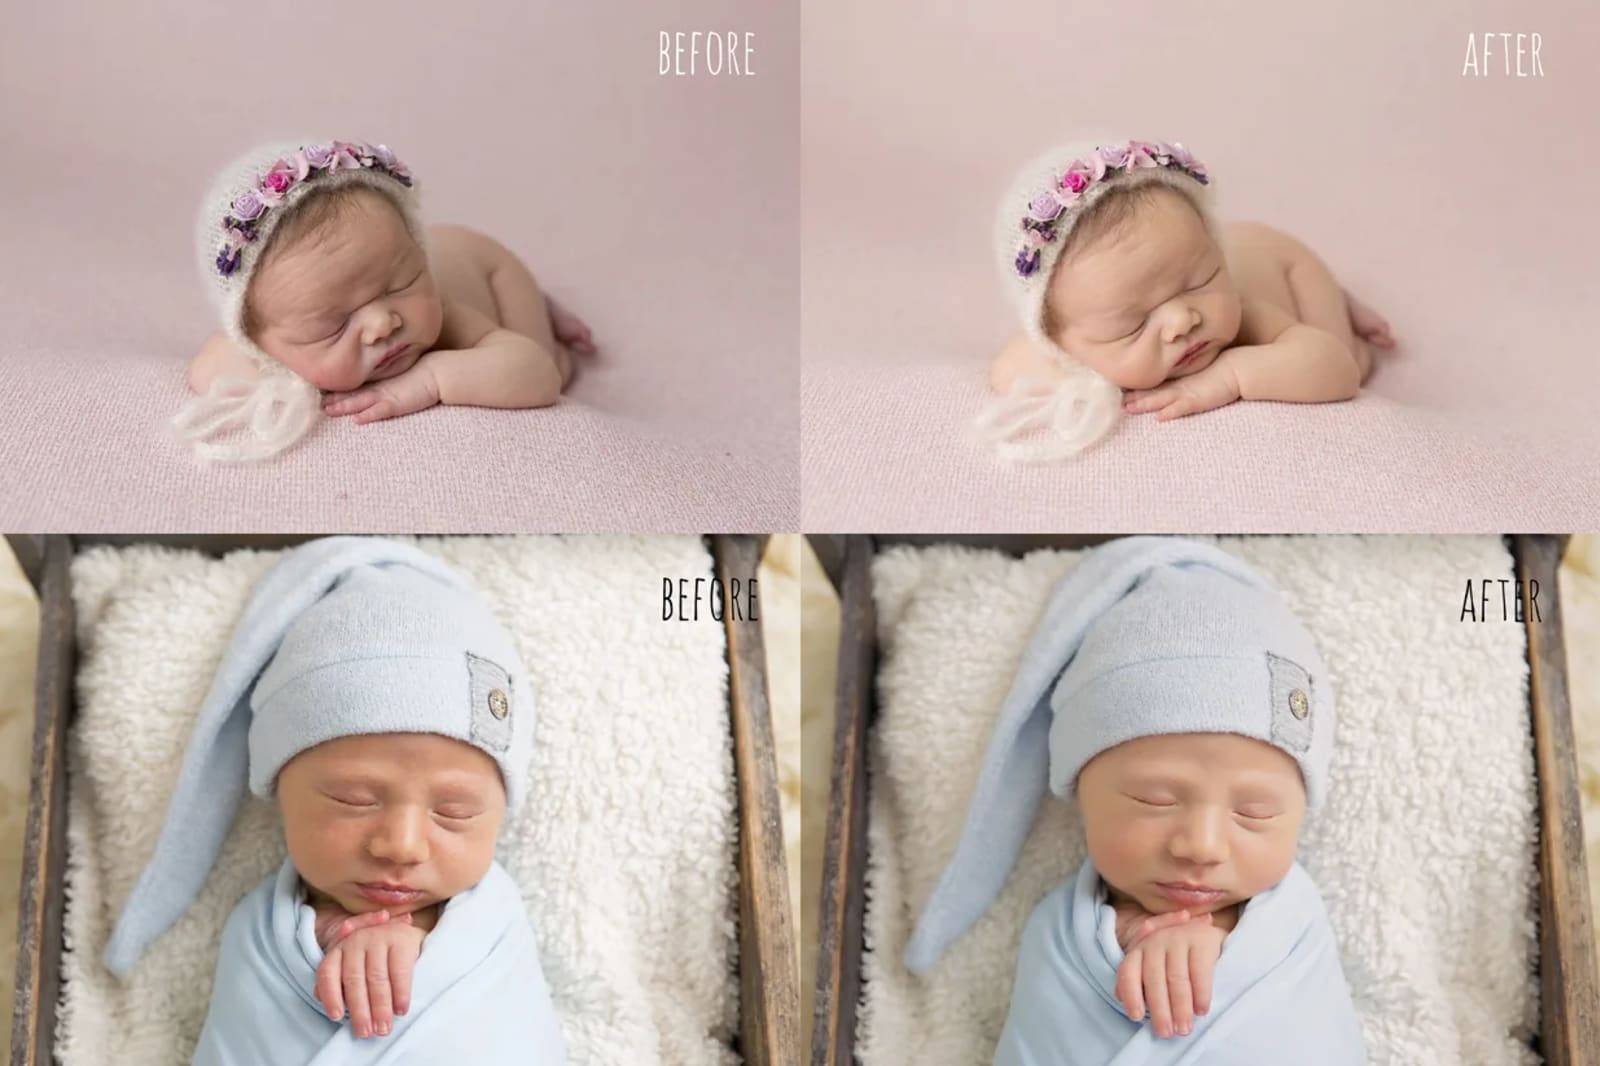
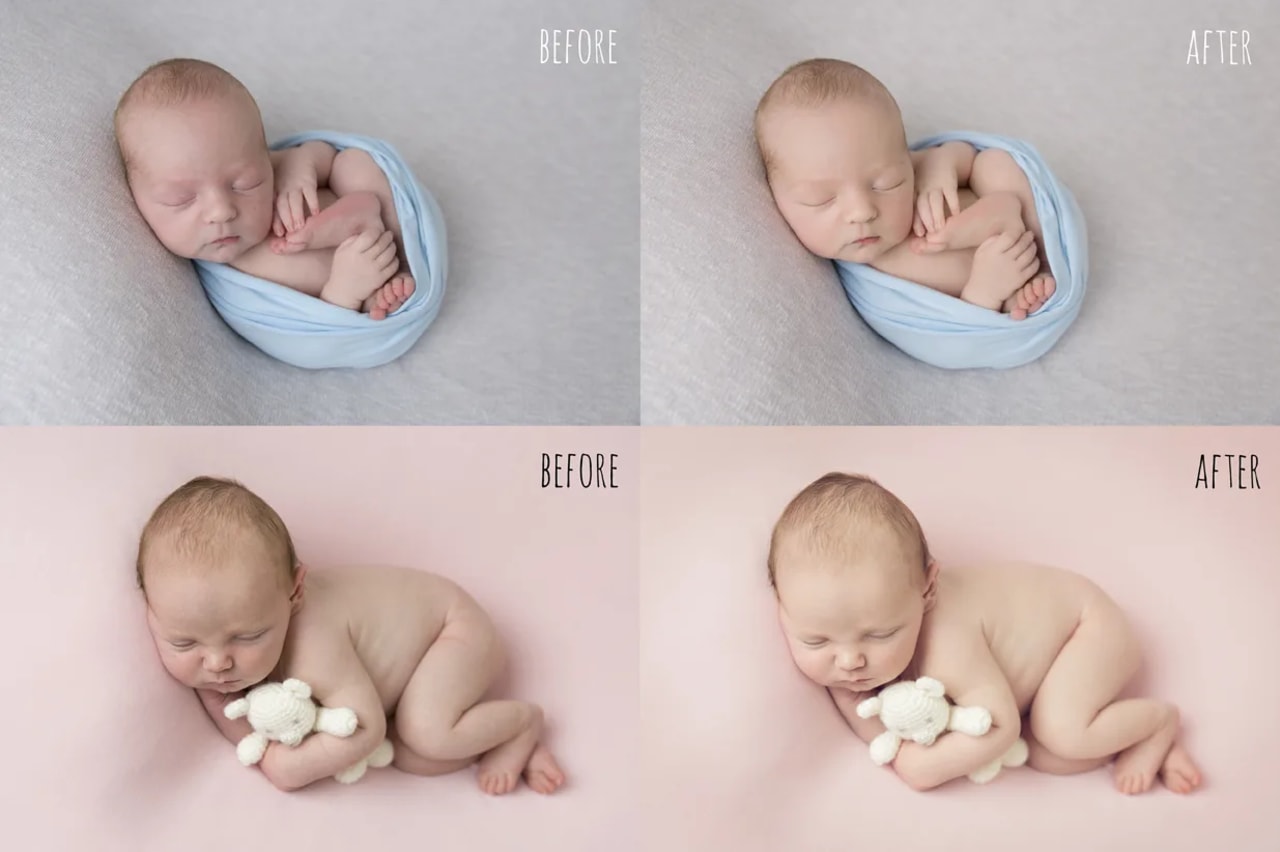
3. Skin Retouching in Photoshop
This is where the real transformation begins. I spend 3–4 hours retouching each client gallery of newborn babies using:
Michael Woloszynowicz's Frequency Separation Action to treat flaky skin, baby acne, and small imperfections, ensuring the baby's skin looks natural and even.
*Kelly Brown's Workflow Action Set for achieving the ideal baby skin tone and enhancing soft pastels.
I use layer masking to keep edits targeted and natural, paying attention to every tiny detail to minimize little imperfections and ensure a clean, soft finish. The calm, settled babies I achieve through effective soothing techniques during the session make the editing process smoother, as babies with peaceful expressions require less correction work.
4. Signature Style & Cohesive Tone
Once retouching is complete, I apply my signature Photoshop action to create consistent tones across the full gallery and add a final polish to the images. This final step helps maintain a uniform aesthetic and ensures all images are professionally edited.
5. Saving & Archiving
Each image is saved as a layered PSD file, preserving flexibility for any future edits while maintaining high-resolution quality.
Streamlining Your Newborn Editing Workflow
For professional photographers, time is precious. A streamlined newborn editing workflow not only boosts efficiency but also gives you greater control over your editing process, helping you deliver consistently high-quality galleries.
Tips to optimize your workflow:
- Use presets and actions to speed up repetitive steps.
- Organize your sessions in folders by type and date.
- Maintain a clear file-naming convention.
- Calibrate your monitor for amazing color accuracy and image quality.
- Make editing fun by using efficient tools that simplify your workflow.
Tools like Adobe Lightroom, Photoshop, and Bridge are essential for managing large image sets efficiently without compromising quality.
Conclusion: Creating Timeless Newborn Portraits
A thoughtful, professional newborn editing workflow enhances the natural beauty of every baby while reflecting your unique photographic style. By focusing on subtle retouching, consistent tones, and a structured editing process, you can produce timeless portraits that your clients, especially parents, will treasure forever and that beautifully capture the connection within the family.
Whether you’re a seasoned photographer or just getting started in newborn photography, developing your own workflow is the key to growth, consistency, and client satisfaction. For best results, try editing newborn photos when you can minimise distractions and maintain focus.
Finally, I’d love to hear about your own experiences and tips—please leave a comment below and share how you approach your newborn editing workflow!